Different LC options are supported in SCIEX OS software and Analyst software. Those that communicate through ethernet differ in their default IP addresses. In this community post, we will detail the LAN setup, configuring the IP address and subnet mask for LC connection. The following steps detail how to setup the correct IP address depending on the LC you are using in your SCIEX LC-MS/MS setup.
Firstly, deactivate any hardware profile that is active, close SCIEX OS software or Analyst software.
Configure the ethernet switch by configuring the ethernet port on the acquisition computer. The SCIEX LC systems require version 4 of the TCP/IP protocol (IPv4). IPv6 is not supported.
- Click Control Panel > Network and Sharing Center
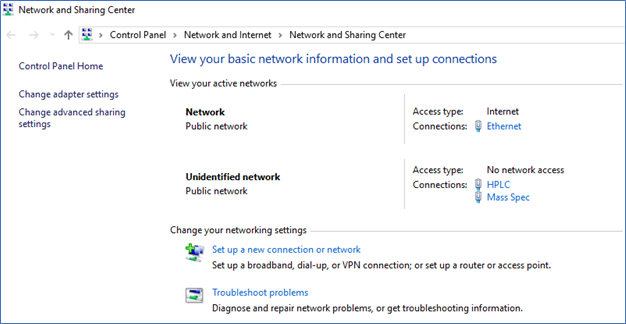
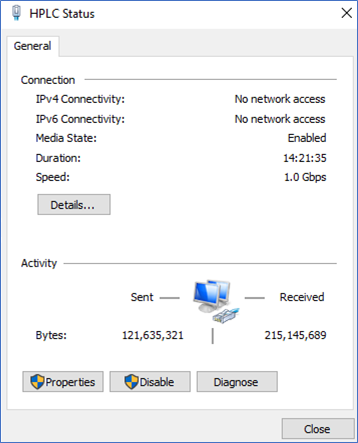
- Double-click the network to which the LC is connected.
- Make sure the networks for any internet connection and the one for the mass spectrometer (IP address 192.168.100.1) are left alone. Unplugging the ethernet cable for the LC will cause the network to turn red, allowing the identification of the correct network to edit for the LC.
- Open the Ethernet Properties dialog by clicking on Properties button in the bottom left of the window
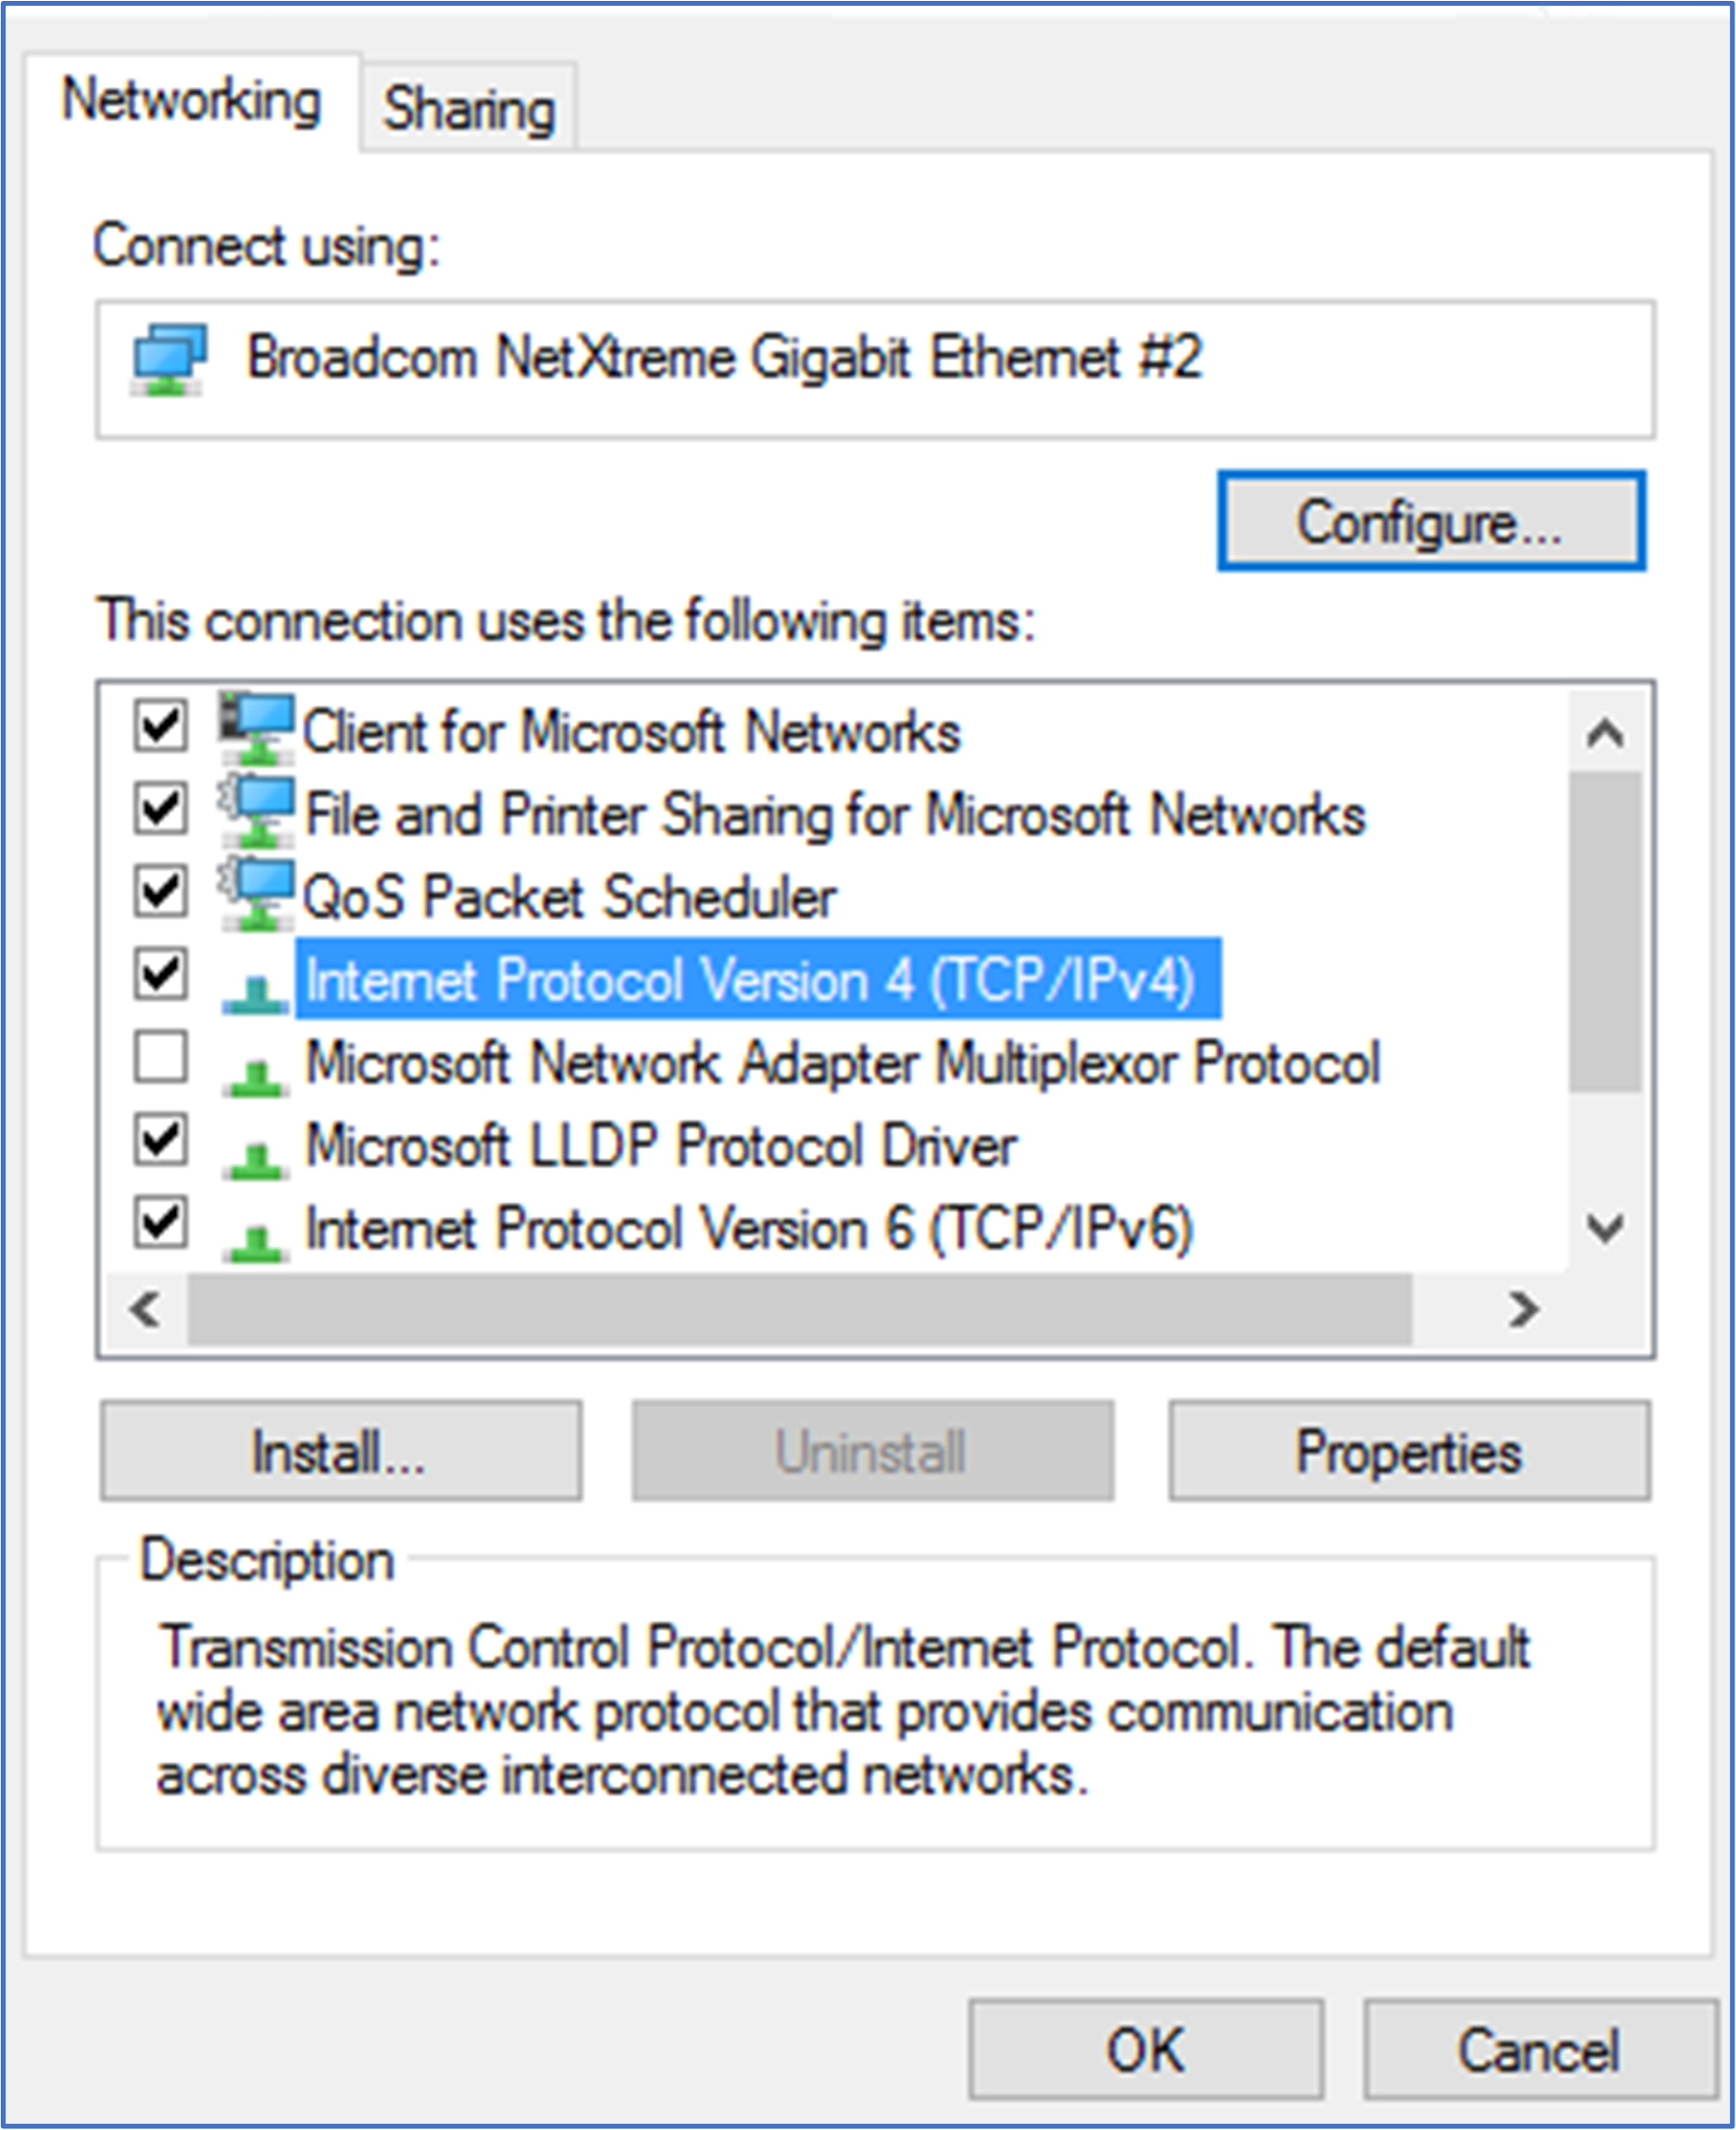
- Click the Networking tab, and then double-click on Internet Protocol Version (TCP/IPV4)
- The General tab will be displayed
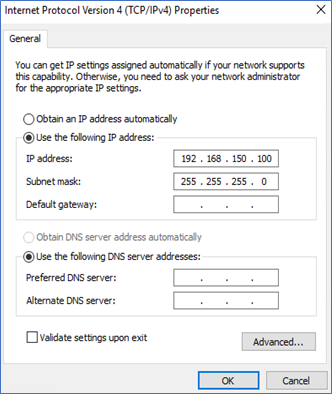
- Click Use the following IP address, and then type the following, depending on the LC you are connecting to:
- Agilent LCs (1200, 1260 and 1290)
- IP address: 192.168.254.11
- Subnet mask: 255.255.255.0
- ExionLC 2.0 system
- IP address: 192.168.150.100
- Subnet mask: 255.255.255.0
- ExionLC AC or AD system
- IP address: 192.168.200.99
- Subnet mask: 255.255.255.0
- MPX 2.0 system
- IP address: 192.168.200.100
- Subnet mask: 255.255.255.0
- PAL3 autosampler
- IP address: 192.168.99.230
- Subnet mask: 255.255.255.0
- Waters LCs (I, M and H Class)
- IP address: 172.16.0.2
- Subnet mask: 255.255.255.0
- Agilent LCs (1200, 1260 and 1290)
- Click OK
- Click OK to close the Ethernet Properties dialog
To test the connectivity of the network, the inputted IP address can be pinged by following the steps below:
- Type “cmd” in the windows search bar to open up the Command Prompt window.
- Open the Command Prompt.
- Type “ping” in the black box and hit the space bar.
- Type the IP address you’d like to ping
- 168. 200.99 for SCIEX ExionLC AC or AD systems
- 168.150.100 for SCIEX ExionLC 2.0 system
- 172.16.0.1 for Waters Acquity system
- Review the ping results displayed.
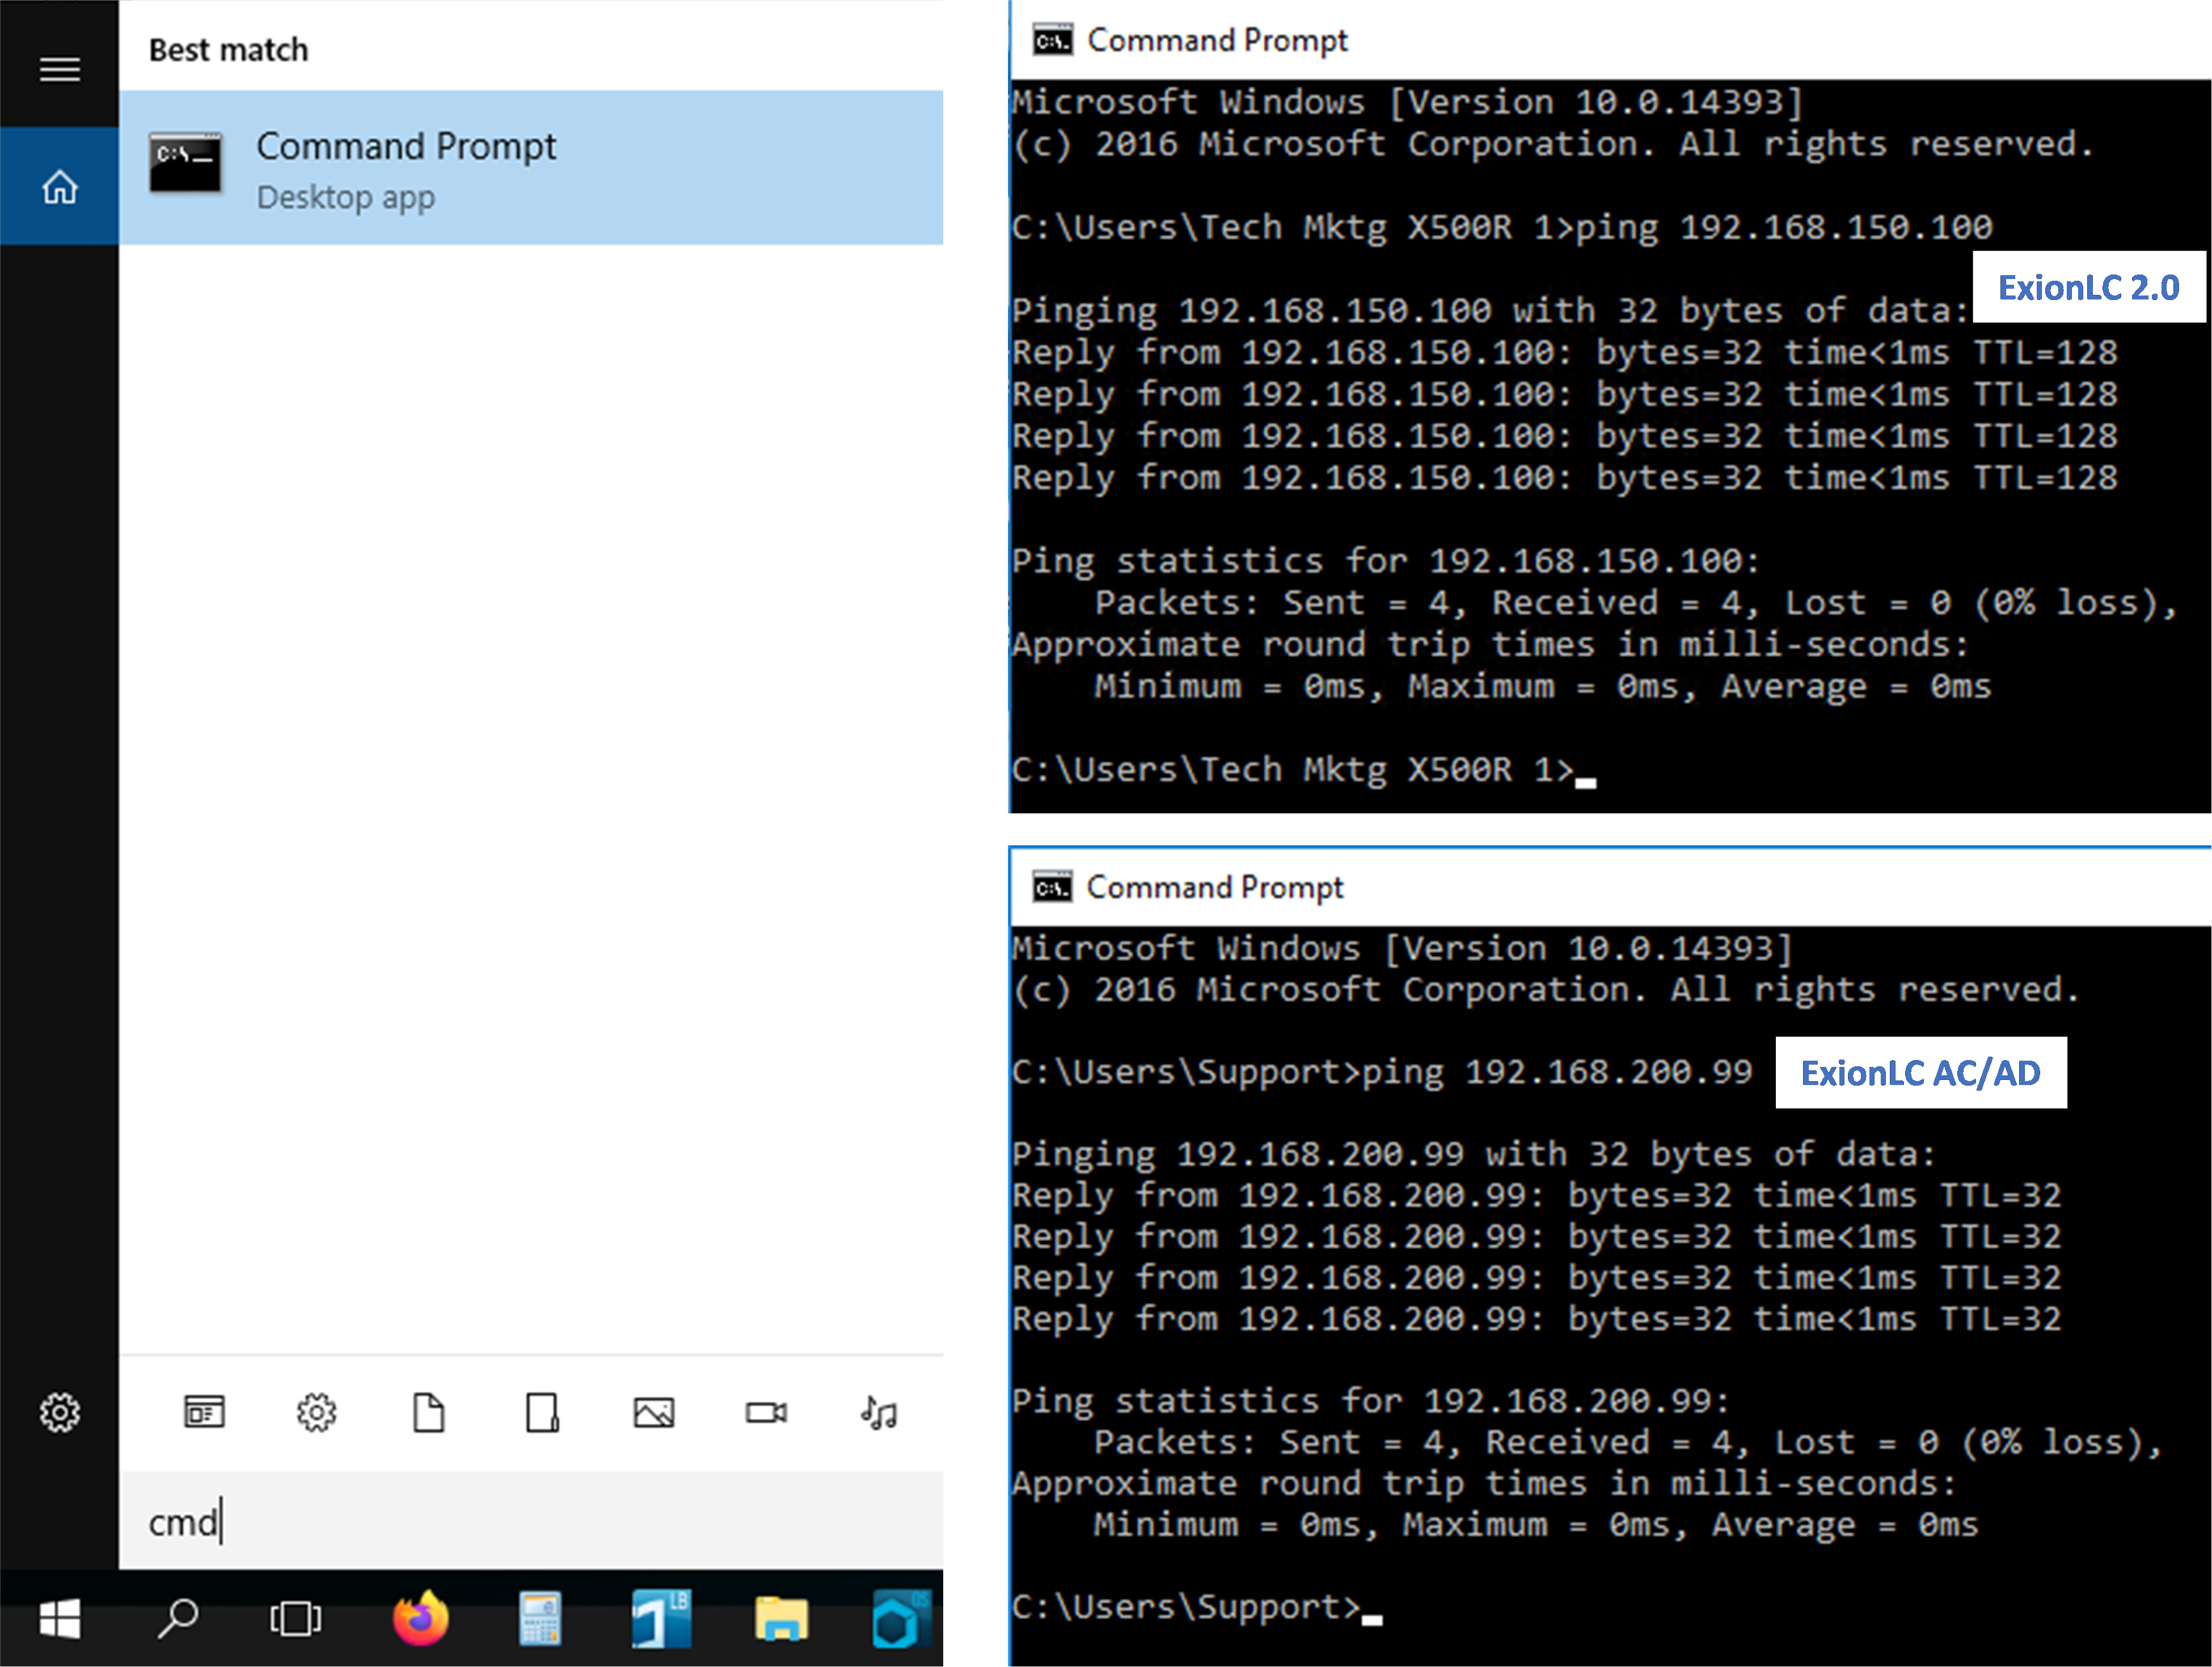
- The number of received pings should match to the number of pings sent. If there is not a match, then check the physical connections and repeat the above steps.


 Contact Support
0 Comments